How to Setting Up Metafields in Shopify
(Step-by-Step Guide)
Metafields allow you to add custom data to products, collections, customers, orders, or other parts of your Shopify store. This is useful for extra details not included by default, such as extra product specs, shipping info, or custom labels.
Step 1: Login to Shopify Admin
• Go to shopify.com and log in to your store.
• On the left sidebar, click Settings (usually at the bottom)
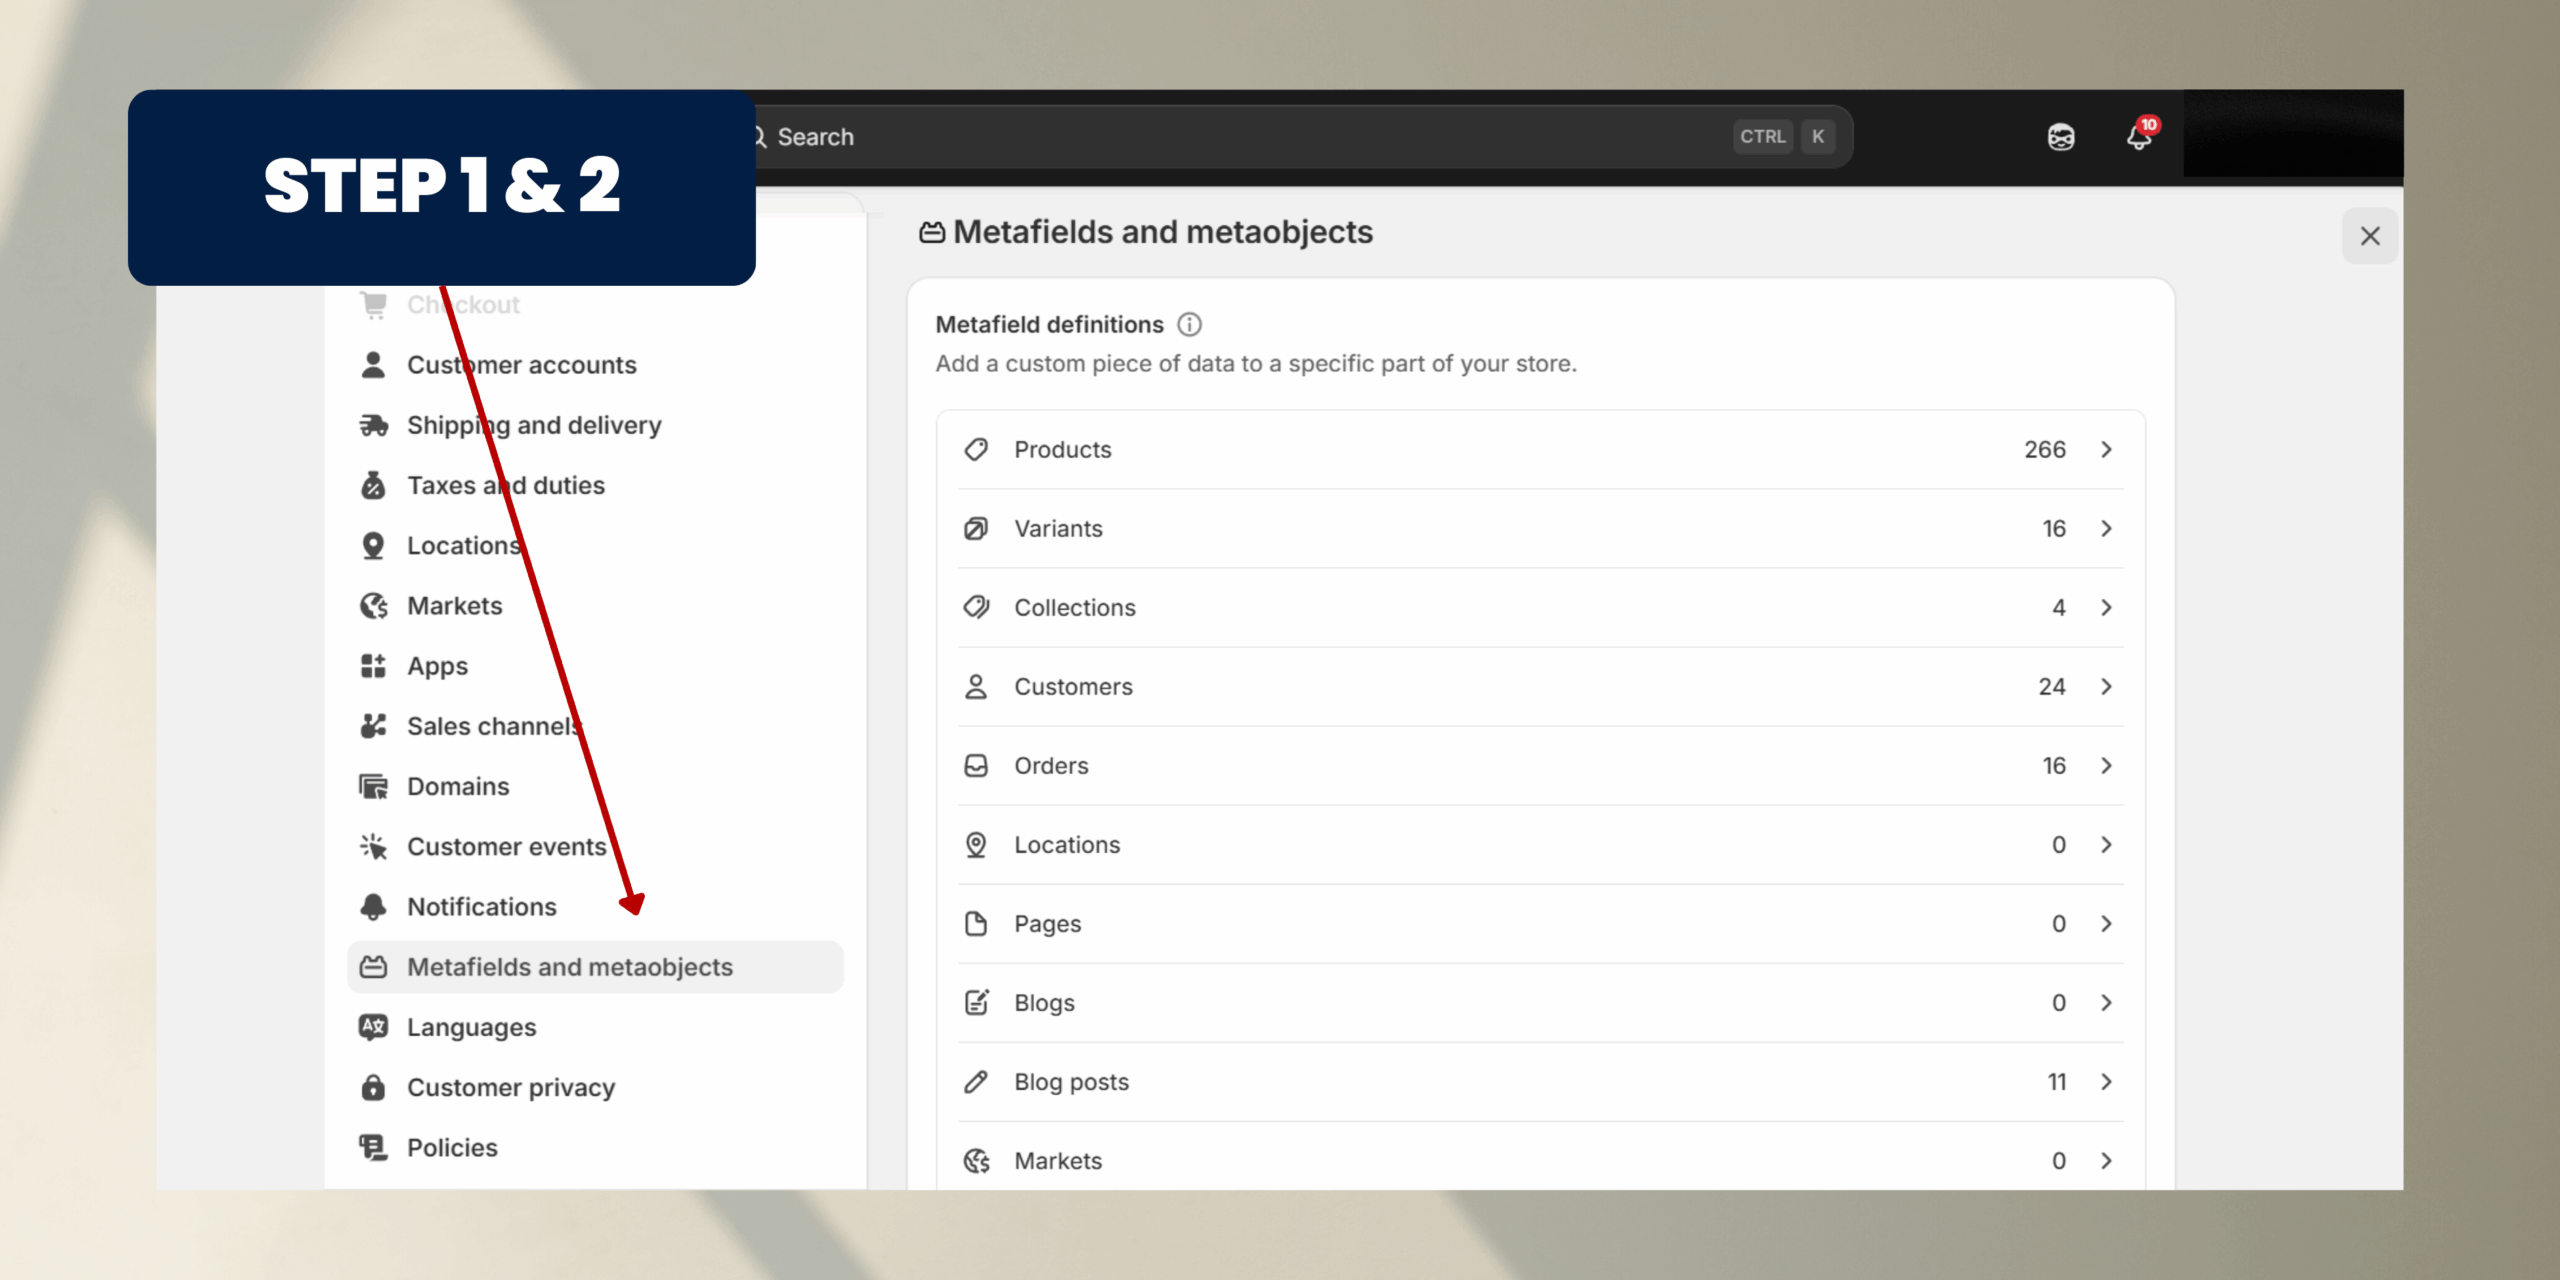
Step 2: Open Metafields
• In the Settings menu, click Metafields.
• Shopify will show you a list of areas where metafields can be applied:
1. Products
2. Variants
3. Collections
4. Customers
5. Orders
6. Blogs, Pages, and more
Description: Metafields are not limited to products; you can attach custom data to almost any object in Shopify.>
• Go to shopify.com and log in to your store.
• On the left sidebar, click Settings (usually at the bottom)
Step 2: Open Metafields
• In the Settings menu, click Metafields.
• Shopify will show you a list of areas where metafields can be applied:
1. Products
2. Variants
3. Collections
4. Customers
5. Orders
6. Blogs, Pages, and more
Description: Metafields are not limited to products; you can attach custom data to almost any object in Shopify.>
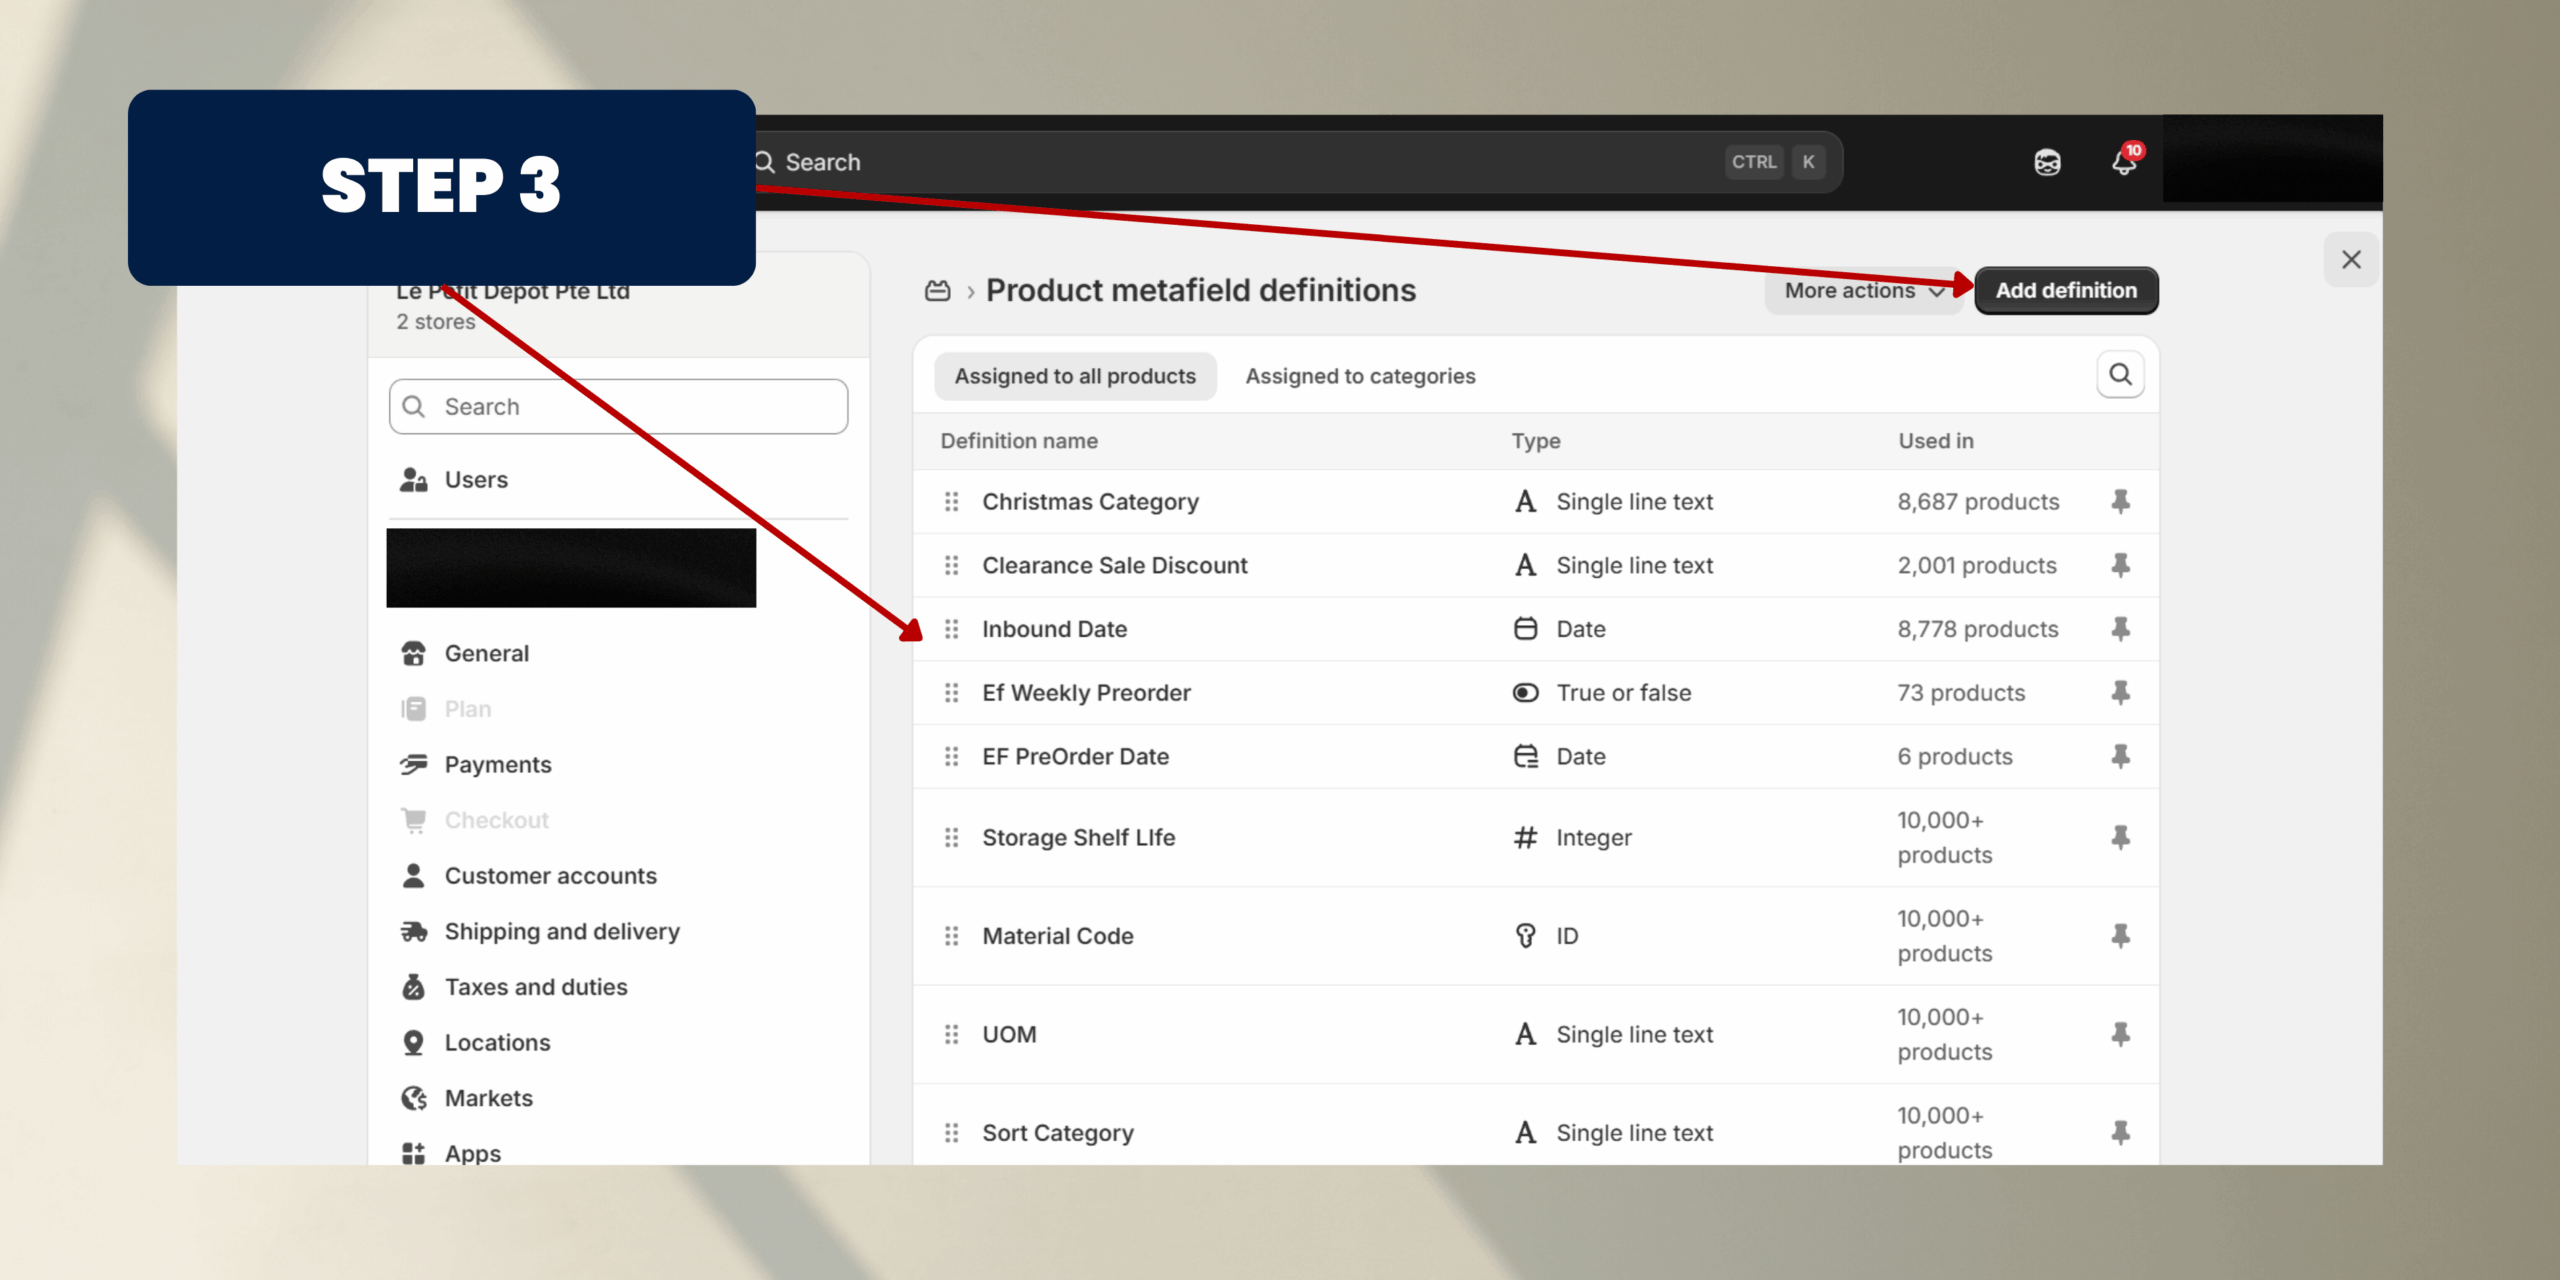
Step 3: Select the Resource (Example: Product)
• Click Products (if you want to add metafields to products).
• Click Add definition.
Description: A “definition” tells Shopify the type of metafield you want, including its name, type, and validations.
• Click Products (if you want to add metafields to products).
• Click Add definition.
Description: A “definition” tells Shopify the type of metafield you want, including its name, type, and validations.
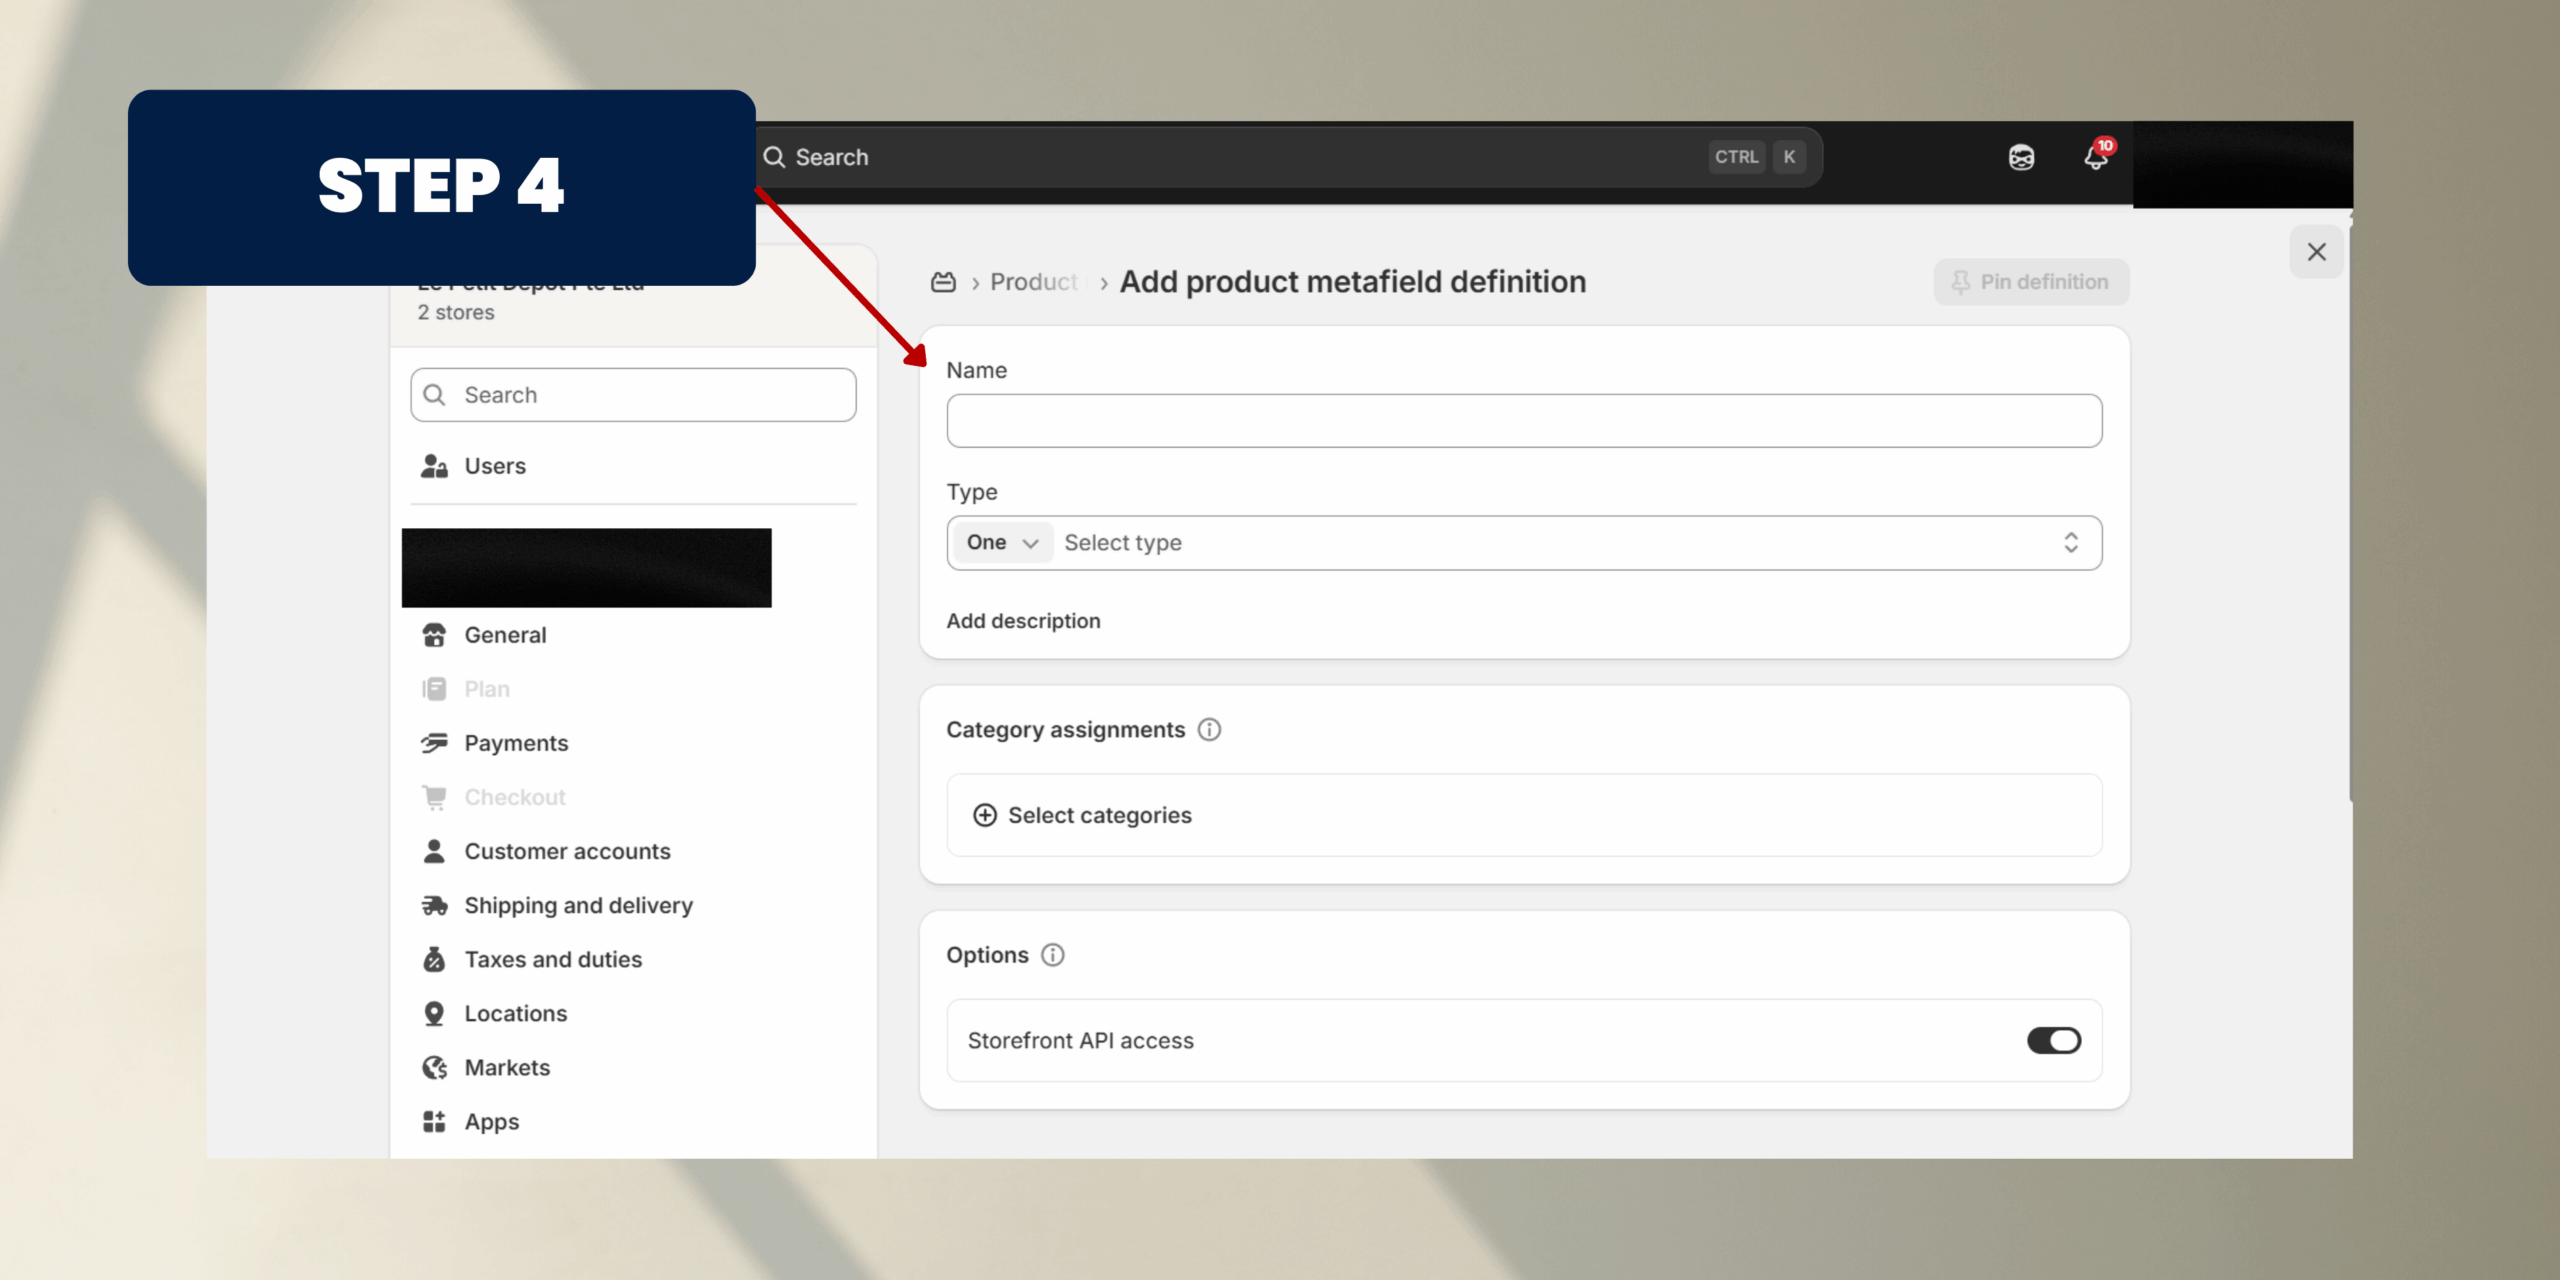
Step 4: Create a Metafield Definition
You’ll see a form to define your metafield. Here’s what to fill:
1. Name: A friendly name for the metafield (e.g., “Material Type”, “Warranty Period”).
2. Namespace and Key: Automatically generated (you can leave it or customize for internal use).
3. Description: Optional – describe what this metafield is for (e.g., “This shows the material of the product”).
4. Type: Choose the data type. Some common ones:
• Single line text: Short text (e.g., color, brand)
• Multi-line text: Longer text (e.g., instructions, ingredients)
• Number / Decimal / Date / Boolean: Use depending on data
• URL / File / JSON / Product / Variant / Collection reference: Advanced options
5. Save the Definition
• Click Save.
Your metafield definition will now appear in the list under the selected resource (e.g., Products).
Description: Defining type and validations ensures your metafields are consistent across products.
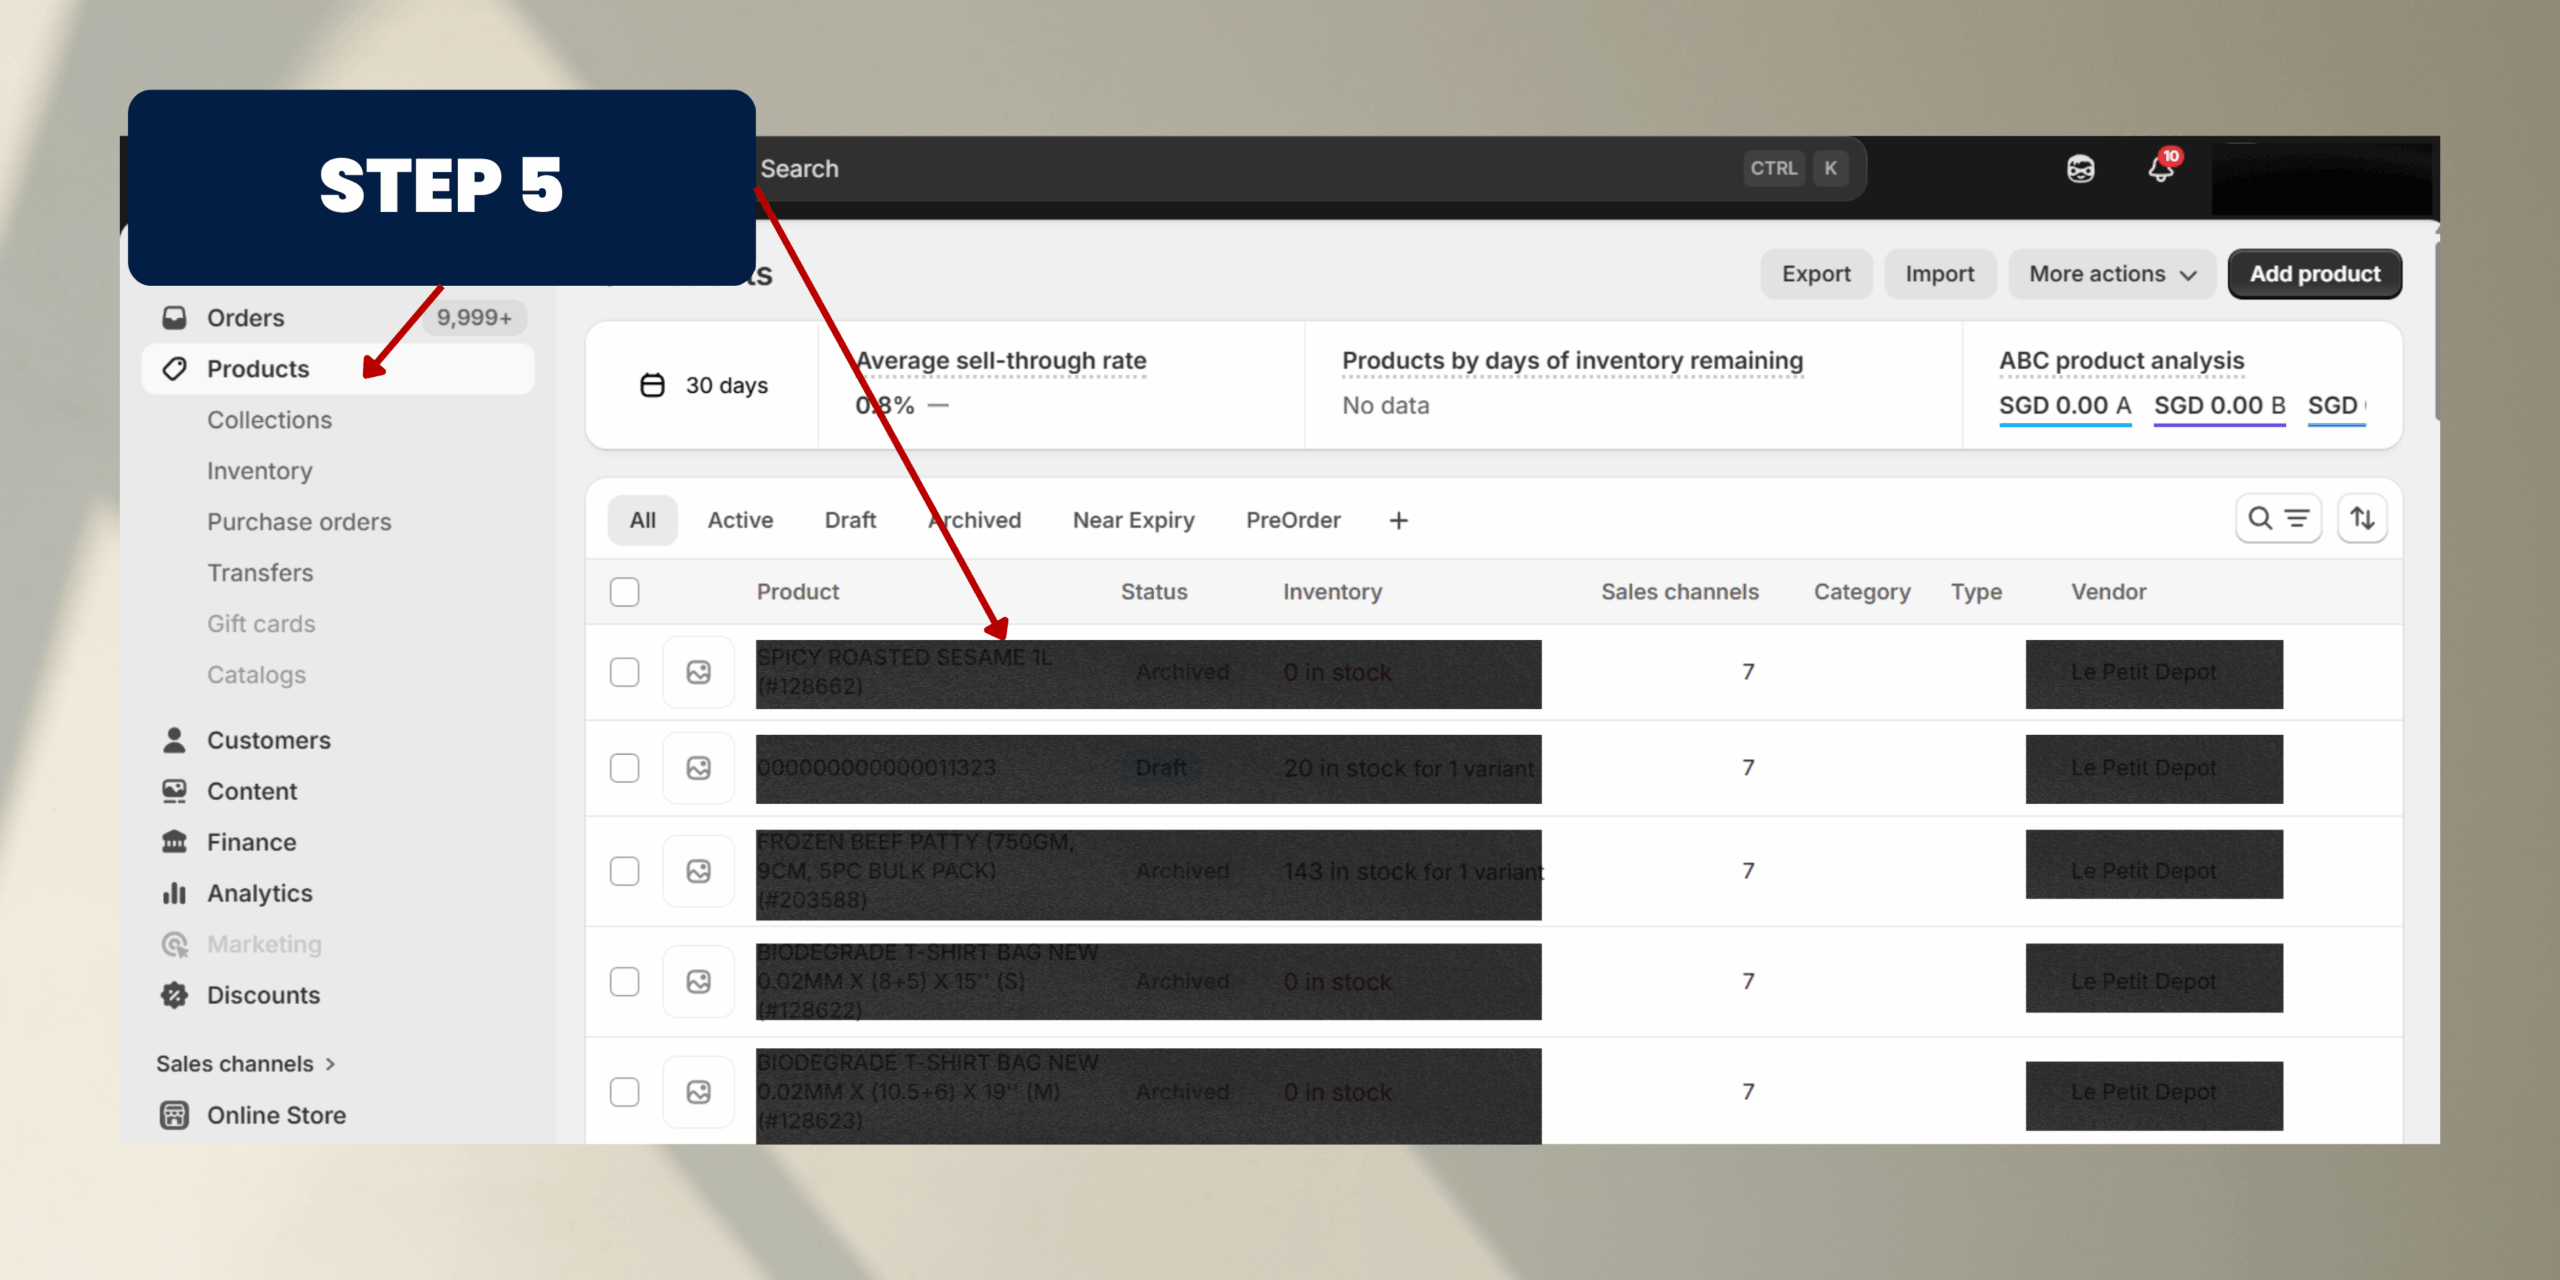
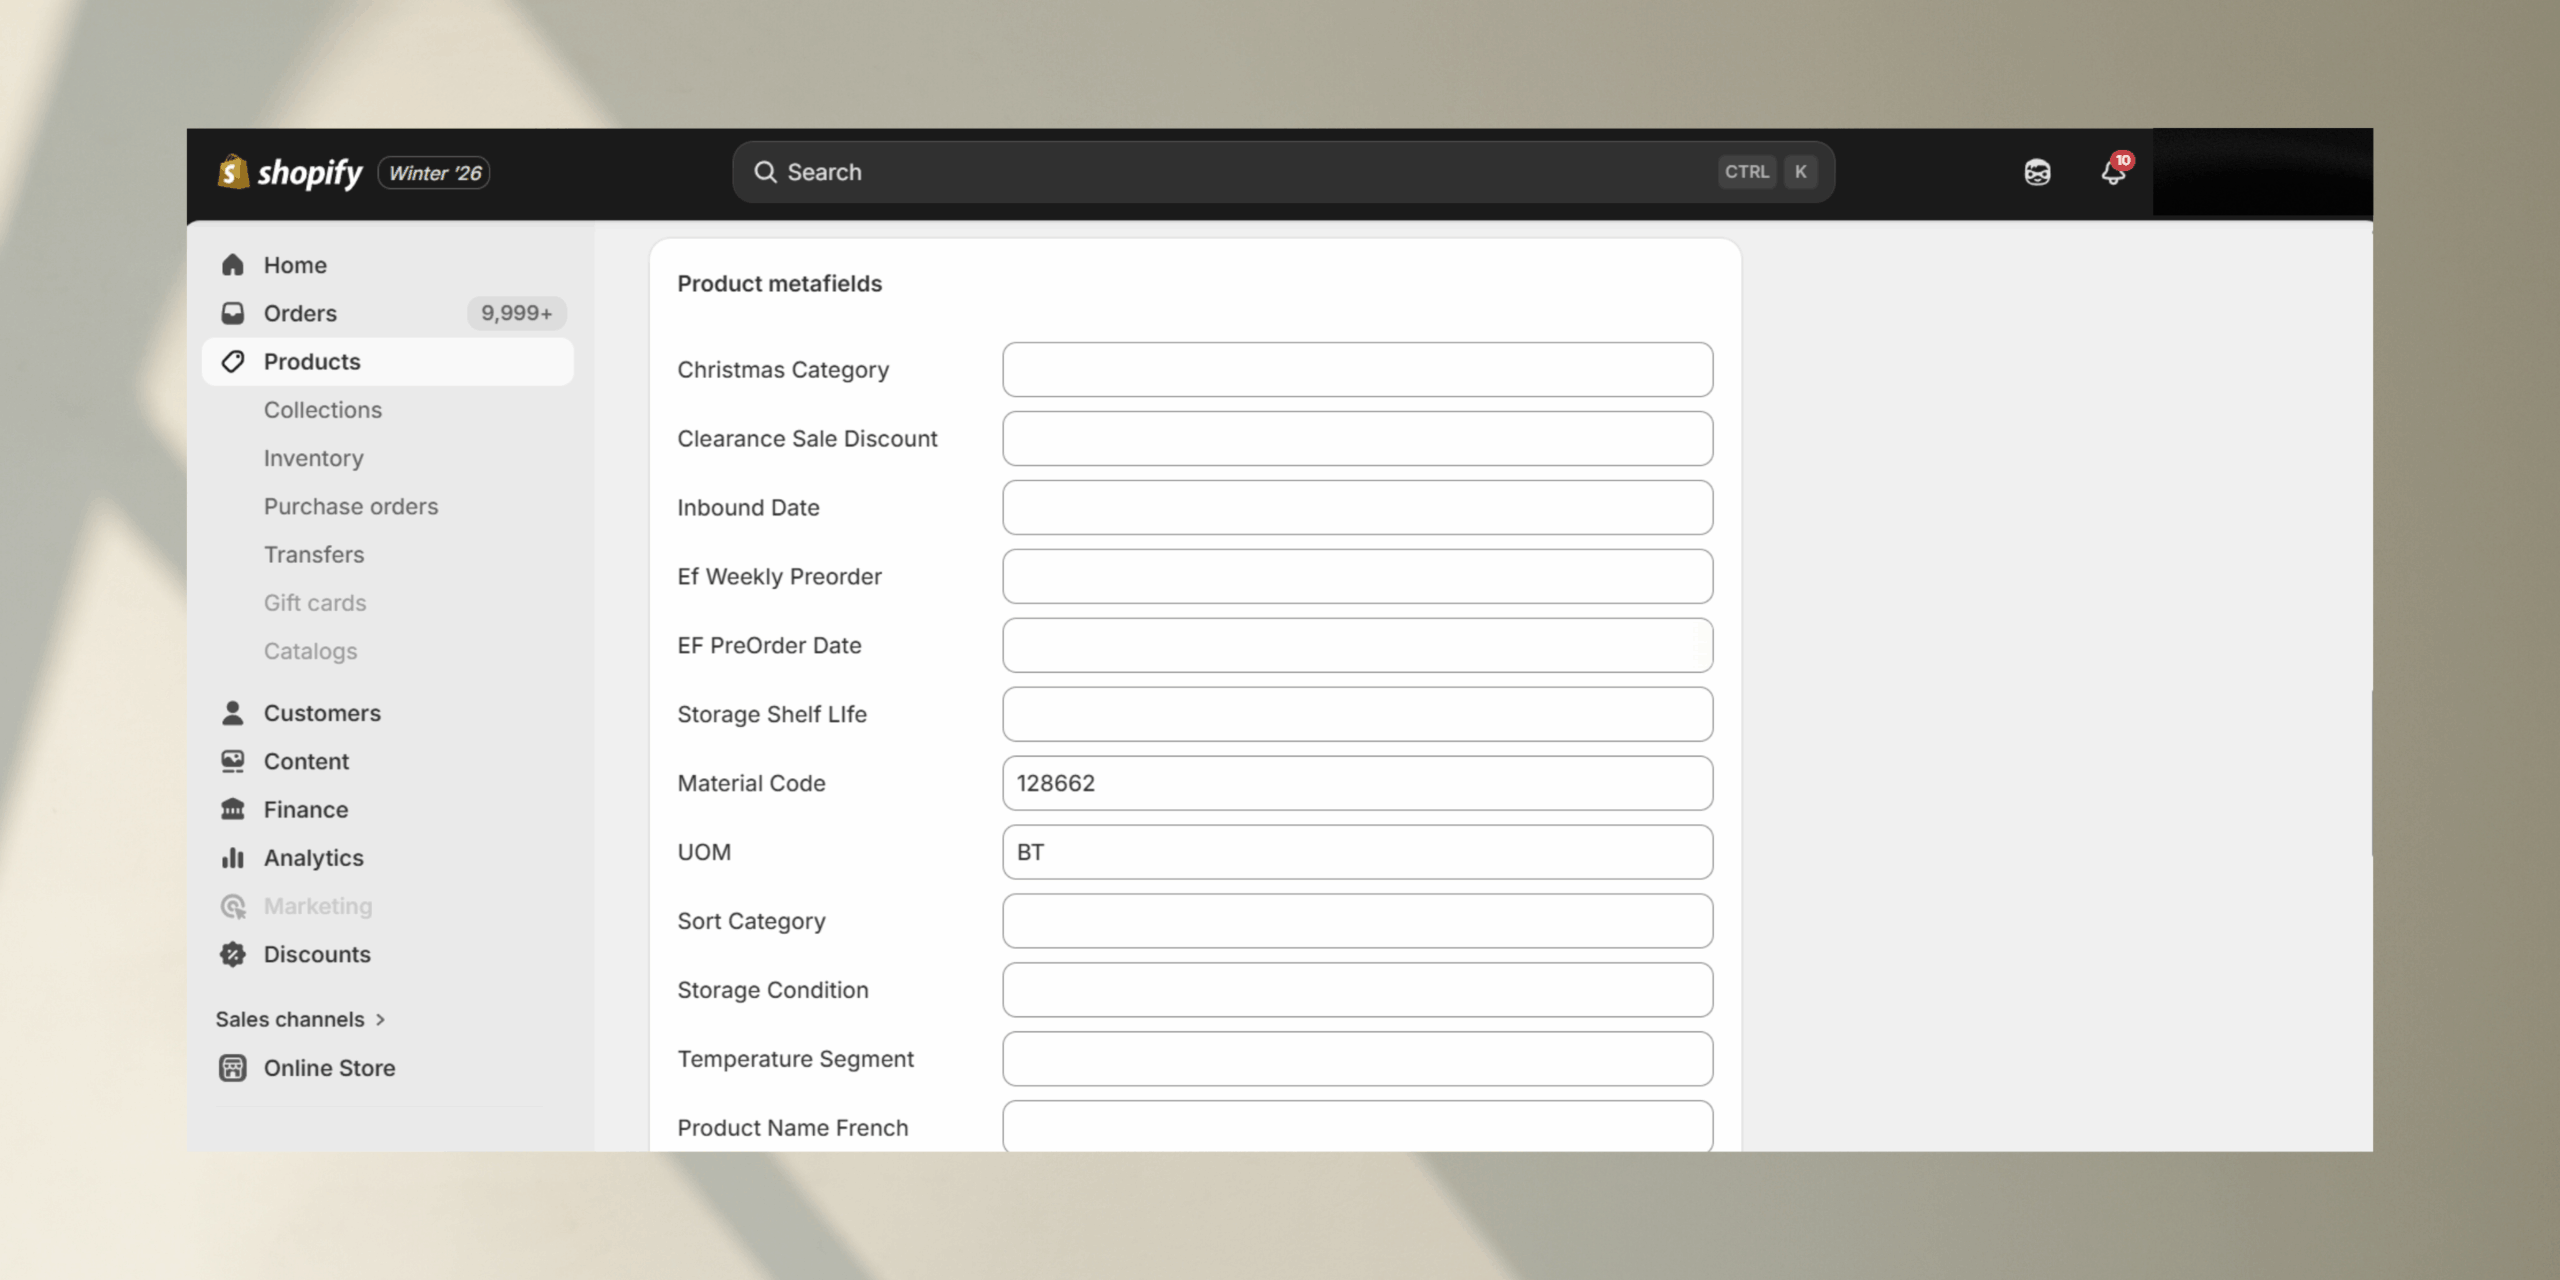
Step 5: Add Metafield Data to Products
• Go to Products → All Products.
• Open a product you want to edit.
• Scroll down to the Metafields section (usually at the bottom).
• Enter the value for the metafield according to the definition you created.
• Click Save.
Description: This is where the metafield stores actual content or data for that product. The definition ensures correct formatting.
February 16, 2026

January 27, 2026

January 19, 2026